
Setting up an Amazon product listing can be really intimidating.
That’s exactly how I felt when creating my first Amazon product listing. And it’s how our clients feel when they ask us for help creating their first product listing.
But here’s the thing―creating an Amazon product listing is perhaps the most fundamental thing you need to know how to do to be successful on Amazon.
As an Amazon seller, your listing essentially acts as both your storefront and your product packaging if you were to sell a physical product.
Just like how an attractive storefront and packaging help attract customers, so too does your listing entice customers to click. Buyers usually make up their mind about your product within 20 secs of clicking onto your listing.
Listings provide everything the customer needs to know for them to decide whether to purchase your product or not. That’s why as a seller, knowing how to effectively construct your listing is paramount to your success on Amazon.
That’s why we’ve created this step-by-step guide for new sellers, detailing how to set up your first Amazon listing as well as identifying key areas on your product page that help draw buyers in and make a purchase.
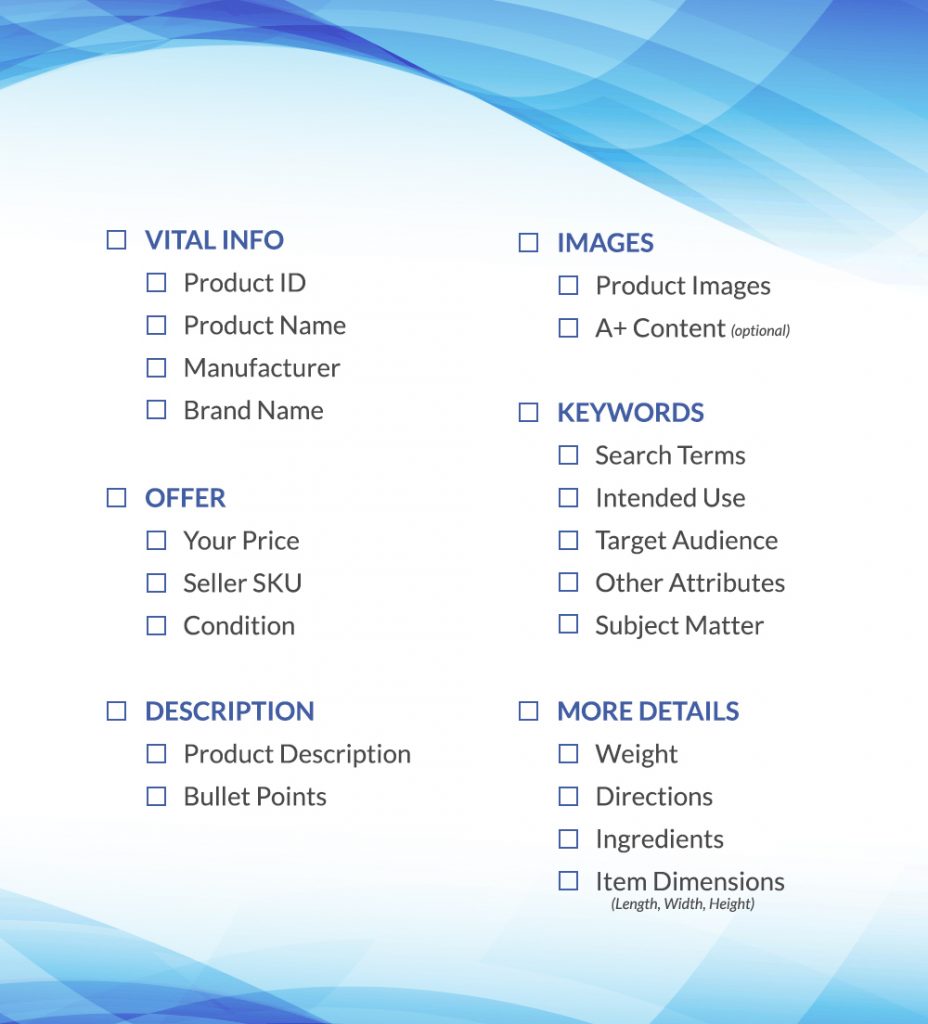
Content Checklist
Before you get started, it’s helpful to have all the info you will need compiled together and ready to go.
Refer to our list below for everything you need beforehand to make the process as smooth as possible.
Alright, now let’s get down to business!
The Listing Creation Process
The entire listing creation process isn’t difficult, but it can be quite unintuitive. You need to know where to go and what to click on.
So let’s take it one step at a time!
1. Getting Started
First off, log into Seller Central, then head over to Inventory > Add a Product.

On the Add New Products page, you have three options. You can:
- Add a new product already sold on Amazon by searching for the product ID or name.
- Add a new product not already sold on Amazon.
- Upload multiple products at once via the bulk uploads method.
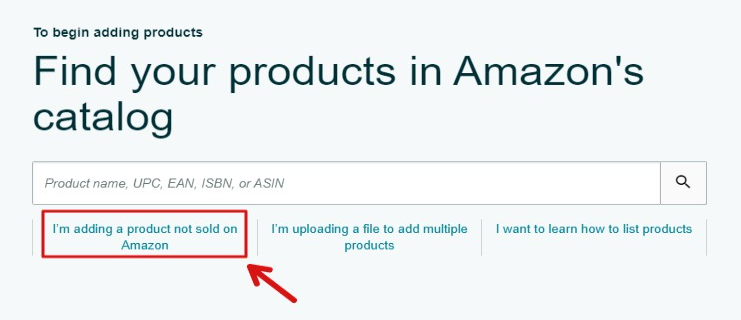
Most people are going to sell their own product (i.e. a product not already on Amazon), so for the purposes of this guide we will show you how to create a product listing with option number two.
2. Determine Category
The next step is to assign a category to your product. You may find your product’s category in one of two ways: either using the search feature or by manually browsing through categories.
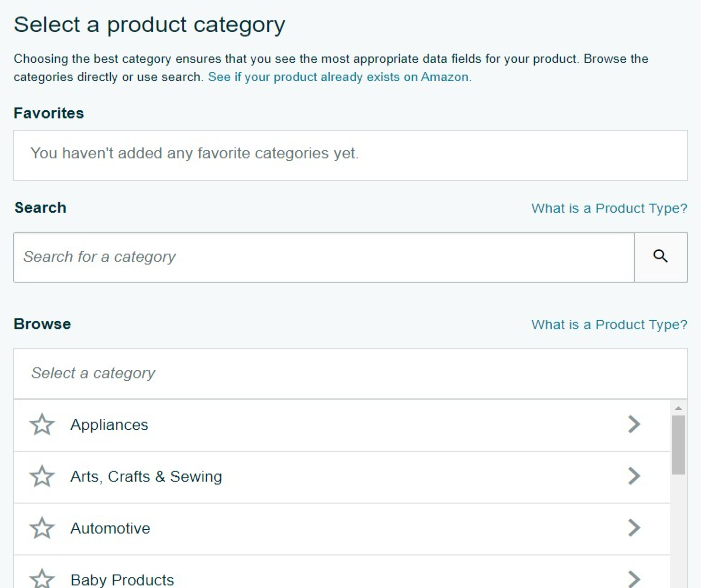
For the sake of simplicity, I prefer to just use the search feature.
After you input the name of your product into the search bar, you’ll get a bunch of different results, some of which are very similar.
If you’re not sure what category to choose, take a look at what category your competitors are in, and go with whatever the majority is in. That said, if you have a good reason to be in another category, then go with that.
3. Fill Out Vital Info
Now for the fun part―actually fleshing out your listing.
The first tab you’ll need to work on is Vital Info.

Let’s walk through each of the major fields in the tab.
Product Name
Your product name or title will be visible in the search results before people decide to click on your listing, so keep that in mind as it will play a big part in your clickthrough rate (CTR).
Moreover, Amazon’s algorithm uses it to help rank your listing, so it should contain as many relevant keywords as possible. Ideally, you want to strike a balance between satisfying the customer while also satisfying the algorithm.
For more information about optimizing your title, check out our title guide and template here.
Manufacturer & Brand Name
If you’re selling your own private-label product, just fill out your brand name for both of these.
Product ID
This is where you’ll input your product’s unique barcode number. Don’t have one? You may be entitled to an exemption—read our section here to see if you qualify.
Other Product Information
Depending on the category, there may be additional fields for you to fill out not visible in the example image above. The rest of these fields, like colour, shape, etc. is optional but highly recommended. It’ll help give Amazon more information about your product which could potentially boost its organic ranking.
If you’re ever unsure about what Amazon is asking from you, you can hover over the info icon to read an explanation.
4. Add Variations
If you’re selling different types of the same product, like different sizes, quantities, or colour, you’ll need to specify that here.
First, open the drop down menu and indicate what type of variation you’re offering.

After you’ve chosen this, more fields will open up for you to specify the name of each variation you’re offering.
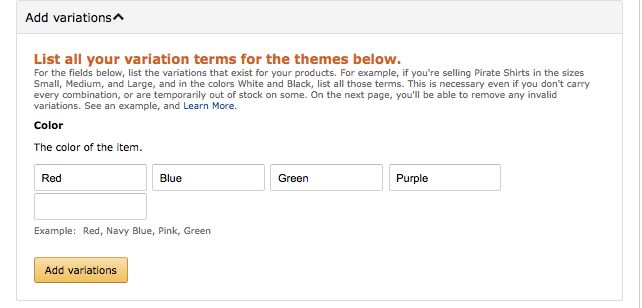
Once you’ve finished the variations, they’ll appear below. Now you just need to fill out the appropriate info for each one, and you’re all set.
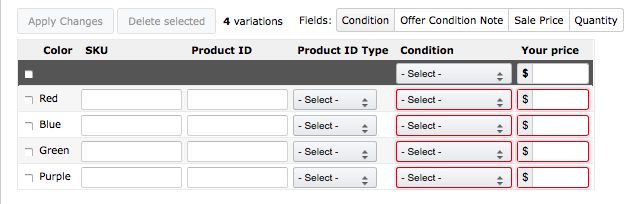
Note that you will need a unique UPC/GTIN barcode for each variation you have. So for example, if you’re selling 6 different colours, you’ll need 6 different barcodes. However, if you have a GTIN exemption, you do not need to provide additional barcodes. More info on this below.
5. Fill Out Offer Tab
Next up is the Offer Tab.
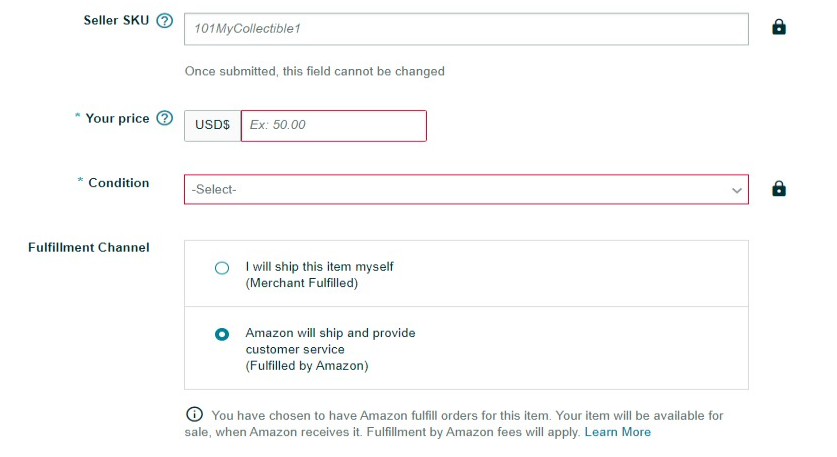
Your Price
This is where you put your selling price, as well as any sale prices you may decide on (this field will appear after you create your listing).
When first launching your product, it’s recommended that you want to have a competitive price (so not the highest), but also avoid massively undercutting the competition because you don’t want to be seen as cheap/low quality.
Once you’ve hit Save and finish and created your listing, you can come back to this tab and you’ll see a few more fields you can fill in.
- Manufacturer’s suggested retail price: this is not the price your customer will pay. In theory, it’s supposed to be the highest price that theoretically you could sell your product for if you weren’t so generous. On your actual listing, it’ll appear as the List Price. In the end, it essentially acts as an “anchor price”, giving your customer a sense of comparison. If you play it right, your customer will feel like they’re getting a good deal.
- Sale price: this is the actual price your customer will pay.
This will create a struck out price with your sale price listed next to it, like so.
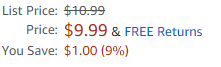
Note that for some categories, it will not show up like this.
For more info on how to find that sweet spot for price, check out our article here.
Seller SKU
This is where you input your seller SKU. If you don’t have one, Amazon will automatically generate one for you.
Condition
This is where you input the selling condition of your product. If you’re private label, you click “new”.
Fulfillment
Lastly, you will input the fulfillment method of your inventory―FBA (Fulfillment by Amazon) or FBM (Fulfillment by Merchant).
6. Enter Compliance Data
This next section is where you provide any battery information about your product (if applicable), as well as upload any Safety Data sheets or note warnings like Prop 65.
Note that this section will not be visible for some categories (since it’s not relevant).
7. Upload Images
This section is where you want to upload your product images.
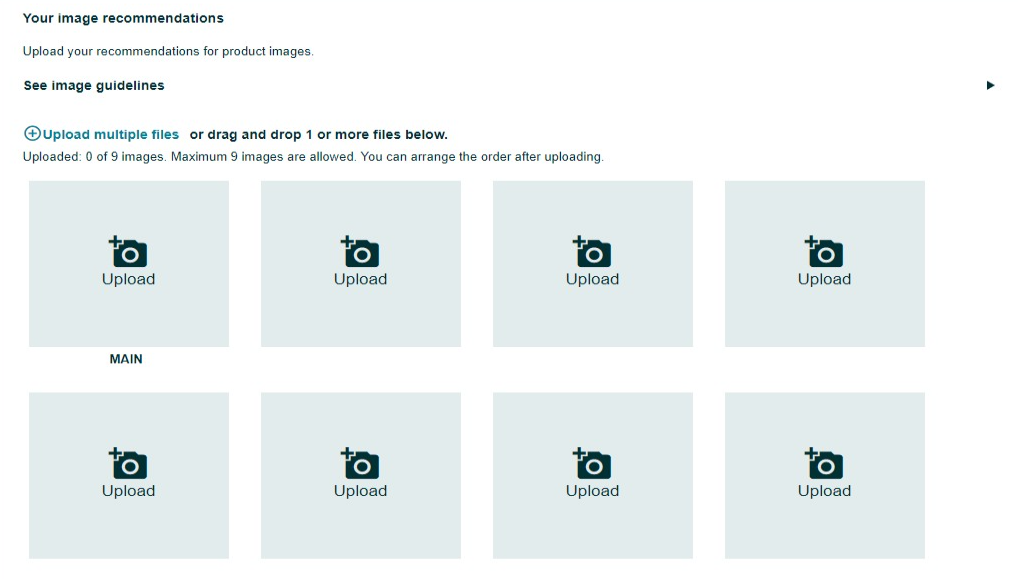
Most categories allow you to upload up to ten images. If you’re uploading photos that’s a variant of a Parent-Child relationship, you’ll want to look for the image slot titled “SWATCH”. This will be the image that displays in the variation preview in your listing.
For more info about creating killer product images that convert, check out our in-depth article here.
8. Description
Now once you’ve created your listing, you’re gonna want to come back and fill this tab out (it only appears after you create it). The Description tab is contains the meat of your listing. It’s divided into two sections:
- Key product features.
- Product Description.
Key Product Features
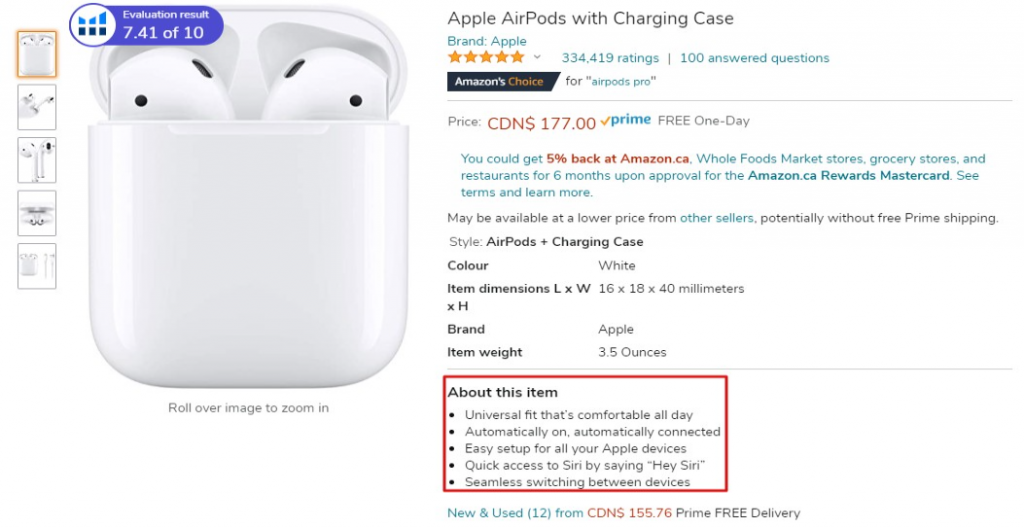
The Key Product Features are basically the bullet points that appear at the top of your listing like this one:
Here are some general pointers to keep in mind:
- The algorithm checks your this section for keywords to help determine your listing’s ranking, so make sure to shove as many relevant keywords in here as possible. That said, don’t turn it into a keyword-salad―your customers will just click away.
- Amazon says they limit you to 100 characters per field, but they don’t actually limit this when you write them. I haven’t really heard of Amazon cracking down on this. But my advice is to keep the bullet points short and sweet, since your customers pretty much have the attention span of a goldfish.
Product Description
The Product Description field allows you to write a more in-depth summary of all your product’s features and benefits. As such, it’s your last chance to convince the customer to buy.
Many people make the mistake of just typing their description into the box. This will make your product description end up being one massive ugly block of text. Make sure to use an HTML editor instead so that you can format it.
In general, try not to repeat the same stuff you said in your bullet points, or at least phrase it differently. Your customers will notice if you’re wasting their time reading something they already know.
Amazon limits you to 2000 characters for this section.
For more information about writing compelling copy for these fields, check out our article here.
Now, if you’re brand registered, you can choose to upload A+ Content instead which will replace the standard product description. We’d highly recommend to do this if you have access to it, since it is proven to skyrocket your conversion rate. Check out our article here for more info about A+ Content.
9. Keywords
The Keywords tab is for you to input additional keywords that won’t appear on your listing, but will help the algorithm identify and rank your product.
You want to save your main, high-volume high-relevancy keywords for your title and description. Any other keywords that don’t make it to your main listing, you’ll want to add those in here. Fill all these out and simply stuff as many additional keywords as you can into this section. Don’t worry, no one will see them, so you don’t need it to be pretty.
The good news is, only one more tab left!
10. More Details
The last tab, woohoo! This tab simply is for the nitty-gritty details of your product. As such, what it looks like will depend on what your product is, so we won’t be able break it down here.
That said, it is very self-explanatory. You simply walk through each field and fill it out as best you can. Some fields won’t be relevant to your product, but that’s perfectly fine as you don’t need to fill them all out.
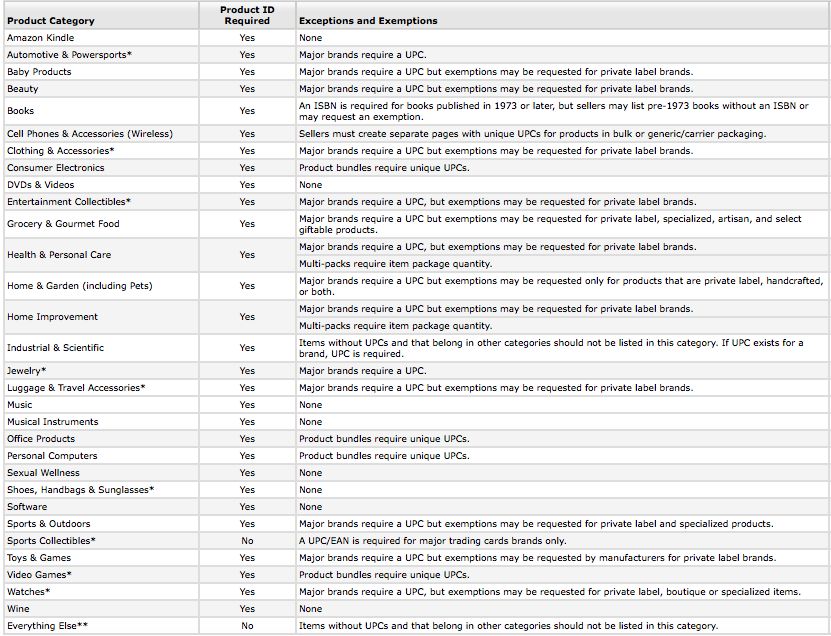
How to Get a GTIN Exemption
Most products need a GTIN (Global Trade Identifier Number) which is usually something like a UPC (Universal Product Code) or ISBN (for books).
However, you may be able to qualify for an exemption depending on your product category.
If you’re wanting to pursue this, check out Amazon’s policy regarding exemptions to see if you could qualify:
I’d recommend asking, because you could save some decent money. The worst is they say no.
Let’s Get Selling!
Once you’re finished, just click Save and finish.
And there you have it! Your first listing is done.
Amazon will assign your listing its own unique ASIN, and you will be able to almost immediately view your listing.
As you can see, it’s not as complicated as it sounds. Once you’ve got the hang of it, it’s a piece of cake actually!
If you need any help with the content of your listing, such as product images or listing copywriting, please check out our Amazon listing services here.
Good luck Sellers!